How to Grow Foxgloves from Seed: A Beginner's Step-by-Step Guide
Foxgloves have a way of making a garden look like it knows something you don't. Those tall spires of thimbled bells arrive in late spring, humming with bees, and then quietly scatter enough seed to do it all again. Buying them as plants is easy, but growing foxgloves from seed is cheaper, more generous, and honestly not much harder than growing a radish. The catch is patience: most foxgloves spend their first year as a low rosette and only send up flowers in their second. Once you understand that rhythm, everything else falls into place.
Know What You're Growing
The common foxglove, Digitalis purpurea, is a biennial. It germinates, builds a rosette of soft grey-green leaves through its first summer, overwinters, then bolts into flower the following late spring before setting seed and dying. Some species behave differently: Digitalis grandiflora and Digitalis lutea are true perennials that will bloom in their first year if started early and return for several seasons.
Check your seed packet for the species name before you plan anything. A perennial foxglove and a biennial foxglove need slightly different expectations, even though the sowing technique is nearly identical.
Sowing: Tiny Seeds, Light Touch
Foxglove seed is dust-fine, which is the single most useful thing to know before you open the packet. It blows away, it clumps, and it disappears if you bury it. Foxglove seed needs light to germinate, so it stays on the surface.
- Fill a shallow tray or small pots with a fine, moist seed-starting mix. Tamp it level so the surface is flat, not lumpy.
- Scatter the seed thinly across the surface. Fold the packet and tap it gently rather than pinching with your fingers.
- Press the seed in with the flat of your hand or a small board. Contact with the mix matters; coverage does not.
- Mist thoroughly with a spray bottle or water from below. A watering can will wash the seed into a corner.
- Cover with a clear dome or a plastic bag to hold humidity, then place the tray in bright light.
- Keep the mix at roughly 65–70°F. Germination usually begins in two to three weeks, though it can be uneven.
Sowing outdoors instead
If you'd rather skip the windowsill, scatter seed directly where you want foxgloves in late spring or early autumn. Press it in, water gently, and keep the patch damp. Autumn sowing is especially reliable in mild climates because winter cold and spring rain do the work for you, and the seedlings are already where they'll spend their lives.
The Cold Stratification Question
Cold stratification means giving seed a period of damp cold to break its dormancy. Digitalis purpurea doesn't strictly require it, but it germinates far more evenly when it gets cool conditions, which is why autumn sowing and unheated greenhouses work so well.
Species from mountain regions, such as Digitalis ferruginea and some forms of Digitalis grandiflora, do benefit from it. If you're starting those indoors, sow onto moist mix, seal the tray in a plastic bag, and refrigerate for three to four weeks before bringing it into warmth and light. Check weekly for early sprouts and move the tray out the moment you see green. Older seed that has sat in a drawer for a couple of years also perks up after a cold spell.
Light and Water for Seedlings
Once seedlings appear, take the cover off. Damping-off fungus thrives in still, humid air, and it will flatten a tray overnight. Give the seedlings as much light as you can manage, ideally twelve to sixteen hours a day under a grow light or in a bright south-facing window. Weak light produces pale, stretched stems that never quite recover.
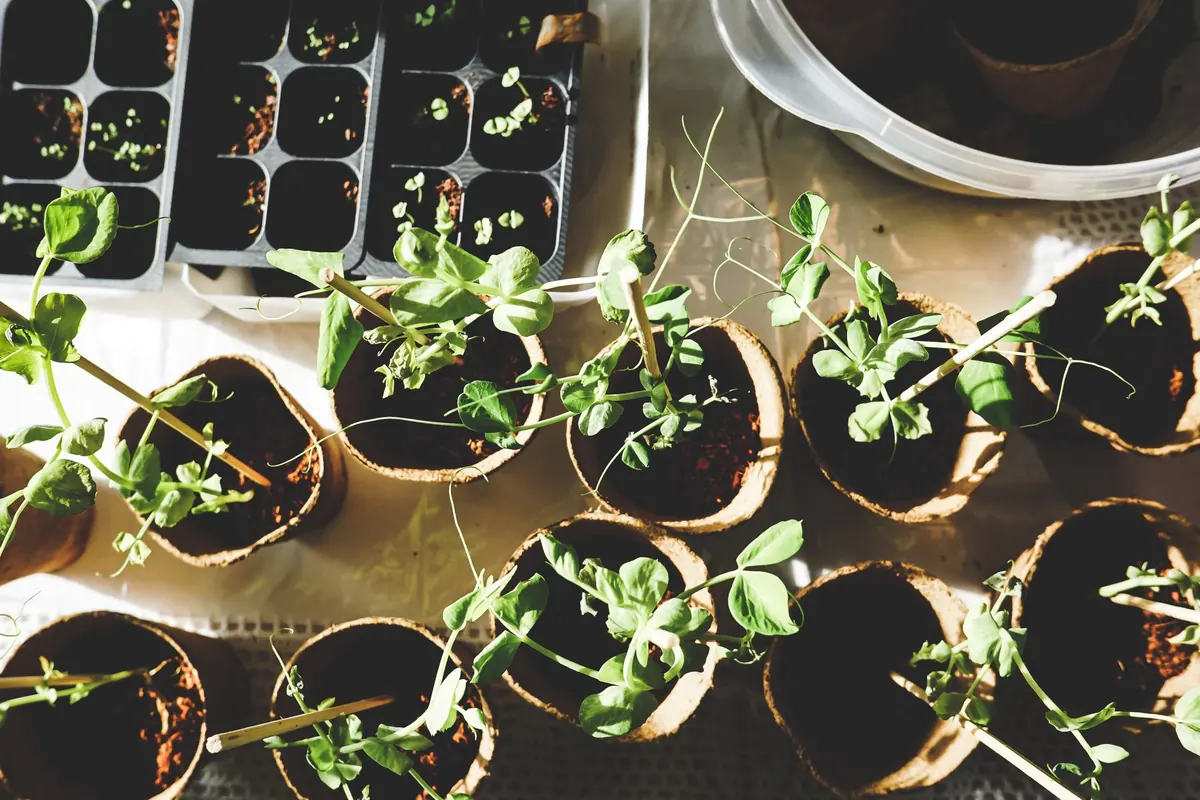
Foxglove seedlings are thirstier than you'd expect. Water from below when possible, let the surface dry slightly between waterings, and feed lightly once they have two sets of true leaves. Thin or prick out seedlings so they stand about two inches apart in the tray, handling them by a leaf rather than the stem.
Transplanting Without Shock
Foxgloves grow a taproot, and they resent having it torn. That means two things: transplant them young, when they have four to six true leaves, and grow them in deep cells or small pots rather than shallow trays. If you raise seedlings in a flat, prick them into individual pots as soon as you can.
Harden them off over seven to ten days, setting them outside in a sheltered spot for a few hours at first and lengthening the time each day. Then plant out into moist, well-drained soil in partial shade or sun. Space Digitalis purpurea about 12 to 18 inches apart; the bigger selections need closer to two feet. Water them in, mulch lightly, and keep them watered through their first dry spell.
If you give foxgloves one thing, give them drainage. They rot in waterlogged winter soil far more often than they freeze.
What to Expect the First Year
Not flowers. For most foxgloves, year one is a rosette: a broad, slightly fuzzy whorl of leaves that may reach a foot across by autumn. It looks unremarkable, and new growers sometimes assume something went wrong. Nothing has. The plant is building the root system and stored energy it needs to throw a four- to five-foot flower spike the following spring.
Perennial species sown in late winter can flower the same year, though the spike will be smaller. Biennials sown indoors in January or February will usually bloom the next spring, not the coming summer. If you want flowers every year, sow a fresh batch two years running, or let your plants self-sow. A single foxglove sheds far more seed than you could ever plant, and seedlings will appear in gravel, in lawn edges, and in cracks you'd swear were solid.
A word on safety: every part of a foxglove is toxic if eaten, including the seed. Wear gloves when handling lots of foliage, wash your hands afterward, and keep plants away from small children and pets who chew. If you suspect someone has ingested any part of the plant, contact a poison control centre or your vet right away rather than waiting for symptoms.
Turning One Planting Into a Colony
The easiest foxglove garden is the one that plants itself. Leave a few flower spikes to ripen and drop seed in mid-summer, then shake the rest where you want new plants. Don't deadhead everything, and don't tidy the leaf rosettes in autumn; those flat green whorls are next year's flowers. Mark the spots so you don't dig them up by mistake in spring.
If you'd rather control the placement, cut the spikes when the lower bells have faded, dry them upside down in a paper bag, and store the seed somewhere cool and dark. Sow it the following autumn or winter. Within two seasons you'll have more foxgloves than you started with, and a garden that keeps handing them back.
Photo: . ▃ / Pexels